Ways to add oomph to a card using different items

A card by Handmade at Hudsons using Coastal Cabana and the Biggest Wish Stamp Set with Artistry Bloom Sequins from Stampin' Up!

Card using Coastal Cabana and the Biggest Wish Stamp Set with Artistry Bloom Sequins

In my last few videos I have shown how to make a set of 4x4 thanks cards and a box to hold them and some envelopes. I explained in my original video that I though that this simple card would work for 3x3 cards and maybe notecards but there may be a little too much white space on a normal card (14.8cm x 10.5 or 4.1" x 5.8".) Having made a ‘normal card’ I like it, but there is a bit too much white space and needs a bit of oomph to make it stand out and take away the white space. As this is a sentiment set, you could take another stamp set with mainly images, but I wanted to show that you don’t need another stamp set and that there a number of relatively simple ways to oomph up your cards.

A card using the Biggest Wish Stamp set and Bermuda Bay, Coastal Cabana and Night of Navy ink, with Basic White paper

A card by Handmade at Hudsons using the Biggest Wish Stamp set from Stampin Up and Bermuda Bay, Coastal Cabana and Night of Navy ink, with Basic White paper

A card using the Biggest Wish Stamp set from Stampin Up and Bermuda Bay, Coastal Cabana and Night of Navy ink, with Basic White paper

  1. Using the reverse of one of the stamps, stamp a random pattern for the background..

  2. Using the smallest stamp in the stamp set to create patterns.

  3. Smooshing - using ink and water on plastic to create a watercolour background (please leave to dry before stamping the sentiment otherwise it may not stamp properly)

  4. Ink Blending with a Blending brush

  5. Ink Blending with a Blending brush and stencil

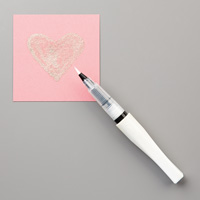
  6. Splattering with Wink of Stella

  7. Block stamping with ink and Wink of Stella

A card by Handmade at Hudsons using the Biggest Wish Stamp set from Stampin Up and Calypso Coral ink, with Basic White paper

A card using the Biggest Wish Stamp set, Calypso Coral ink, with Basic White paper

A card by Handmade at Hudsons using the Biggest Wish Stamp set from Stampin Up and Calypso Coral ink, with Basic White paper

A close up of a card using the Biggest Wish Stamp and Calypso Coral ink, with Basic White paper

Measurements

Metric

10.5 cm x 14.8 cm (10.5 by full length scored at 14.8cm)

Panel – 10cm x 14.3cm 

Imperial

4 1/8" x  5 7/8" (4 1/8” by full length scored at 5 7/8)

Panel – 3 7/8” x 5 5/8”

A card using the Biggest Wish Stamp set and Mango Melody ink, with Basic White paper

A card by Handmade at Hudsons using the Biggest Wish Stamp set and the smooshing technique with Melon Mambo and Night of Navy ink

A card using the Biggest Wish Stamp set and the smooshing technique with Melon Mambo and Night of Navy ink

A card by Handmade at Hudsons using the Biggest Wish Stamp set, blending brushes and mask with Melon Mambo and Magenta Madness

A card using the Biggest Wish Stamp set blending brushes and mask with Melon Mambo and Magenta Madness

A card by Handmade at Hudsons using the Biggest Wish Stamp set and blending brushes with Melon Mambo and Magenta Madness

A card using the Biggest Wish Stamp set and blending brushes with Melon Mambo and Magenta Madness

A card by using the Biggest Wish Stamp set Wink of Stella and Calypso Coral

A card by Handmade at Hudsons using the Biggest Wish Stamp set Wink of Stella and Calypso Coral

A card using the Biggest Wish Stamp set Wink of Stella and Calypso Coral

My favourite is definitely the Wink of Stella and coloured splatters. Which is yours?

How I use Large Ink Pads

df.jpg

Are you new to Stampin’ Up! ink pads, or would you like to find out other ways to use your large ink pads. Over the years that I have been creating cards and items, I've fallen in love with the Stampin’ Up! inks and colours. If you're looking for high quality ink pads with gorgeous colour options (bonus being that they co-ordinate with the paper, pens and embellishments), these ink pads are for you. All the cards on this page were made using different techniques and the large Stampin’ Up! ink pads. There are a number of ways that they can be used.

df birch.jpg

There are different ways you can use large ink pads. These are a few:

Stamping- using the ink pad to ink up stamps, large ink pads make it super easy to ink up large backgroun stamps.

Stamping with blocks - either with or without water (look out for a future video on ways to use blocks for stamping.

Stamping with other items - geli plates or other items such as Stampin’ Marker lids or the end of pencils.

Creating you own embossing colours - using Versa mark and the ink pad with embossing powder to create you own coloured embossing (stamp in the Versa Mark first then add the ink, this prevents adding colour to the Versa mark pad.)

Adding colour- their are a number of ways to add colour to your cards, using Wink of Stella, Water Pens or blender pens.

The video below shows the different ways I use the ink pads and the cards I have made.

Look out over the next few weeks for more in-depth videos on how to use your ink pads. I am super excited about sharing different ways to stamp with blocks, it is one of my favourite techniques, what is yours?
post-signature.png

Playing in my Craft Room

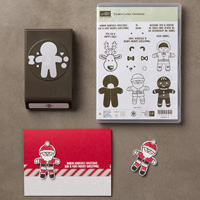
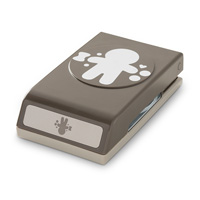
Yesterday I got to spend some time in my craft room. Something I have not been able to do for a while due to family commitments. I was playing with the Christmas Cookie Cutters stamps and Punch.

My prototype is shown in this post. Contary to popular belief, everyone spends time playing with cards which are slightly less than perfect (too much glue, argh).

Cookie Cutter Christmas Basics.png

But I will be perfecting this today. I only have a few to play with.  (The picture is of three of many)

I am experimenting with Wink of Stella and embossing powders for Santa, but also pondering the stripes at the side.

So many ideas so little time.